Network Namespace
A namespace wraps a global system resource in an abstraction that makes it appear to the processes within the namespace that they have their own isolated instance of the global resource. Changes to the global resource are visible to other processes that are members of the namespace, but are invisible to other processes. One use of namespaces is to implement containers. (摘录自Linux man page中对namespace的介绍)
Namespace是Linux提供的一种对于系统全局资源的隔离机制;从进程的视角来看,同一个namespace中的进程看到的是该namespace自己独立的一份全局资源,这些资源的变化只在本namespace中可见,对其他namespace没有影响。容器就是采用namespace机制实现了对网络,进程空间等的隔离。不同的Container(在K8S中是以Pod为单位)属于不同namespace,实现了Container或Pod之间的资源互相隔离,互不影响。
Linux提供了以下七种namespace:
| 类型 | 用途 |
|---|---|
| Cgroup | Cgroup root directory |
| IPC | System V IPC, POSIX message queues |
| Network | Network devices, stacks, ports, etc. |
| Mount | Mount points |
| PID | Process IDs |
| User | User and group IDs |
| UTS | Hostname and NIS domain name |
Network namespace允许你在Linux中创建相互隔离的网络视图,每个网络名字空间都有自己独立的网络配置,包括:网络设备、路由表、IPTables规则,路由表、网络协议栈等。新建的网络名字空间与主机默认网络名字空间之间是隔离的。我们平时默认操作的是主机的默认网络名字空间。
+---------------------------------------------------------------------------------------+
|                                       Linux Host                                      |
|                                                                                       |
|  +--------------------------------------+   +--------------------------------------+  |
|  |  network namespace1                  |   |  network namespace1                  |  |
|  | +---------------+  +---------------+ |   | +---------------+  +---------------+ |  |
|  | |network devices|  |  route table  | |   | |network devices|  |  route table  | |  |
|  | +---------------+  +---------------+ |   | +---------------+  +---------------+ |  |
|  | +---------------+  +---------------+ |   | +---------------+  +---------------+ |  |
|  | |    iptables   |  |protocol stack | |   | |    iptables   |  |protocol stack | |  |
|  | +---------------+  +---------------+ |   | +---------------+  +---------------+ |  |
|  +--------------------------------------+   +--------------------------------------+  |
|                                                                                       |
|                       +--------------------------------------+                        |
|                       |        default network namespace     |                        |
|                       | +---------------+  +---------------+ |                        |
|                       | |network devices|  |  route table  | |                        |
|                       | +---------------+  +---------------+ |                        |
|                       | +---------------+  +---------------+ |                        |
|                       | |    iptables   |  |protocol stack | |                        |
|                       | +---------------+  +---------------+ |                        |
|                       +--------------------------------------+                        |
|                                                                                       |
+---------------------------------------------------------------------------------------+
Veth
The veth devices are virtual Ethernet devices. They can act as tunnels between network namespaces to create a bridge to a physical network device in another namespace, but can also be used as standalone network devices.
veth devices are always created in interconnected pairs. A pair can be created using the command:
# ip link add <p1-name> type veth peer name <p2-name>
In the above, p1-name and p2-name are the names assigned to the two connected end points. Packets transmitted on one device in the pair are immediately received on the other device. When either devices is down the link state of the pair is down.(摘录自Linux man page中对veth的介绍)
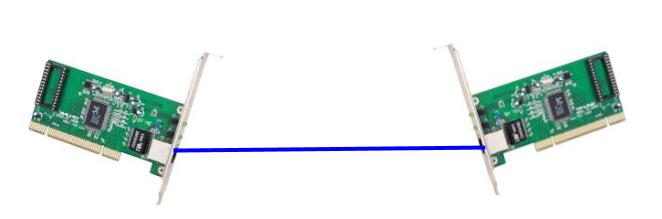
从Linux Man page的描述可以看到,veth和tap/tun类似,也是linux提供的一种虚拟网络设备;但与tap/tun不同的是,veth总是成对出现的,从一端进入的数据包将会在另一端出现,因此又常常称为veth pair。我们可以把veth pair看成一条网线两端连接的两张以太网卡,如下图所示:
由于network namespace隔离了网络相关的全局资源,因此从网络角度来看,一个network namespace可以看做一个独立的虚机;即使在同一个主机上创建的两个network namespace,相互之间缺省也是不能进行网络通信的。
veth提供了一种连接两个network namespace的方法。如果我们把上图中网线两端的网卡分别放入两个不同的network namespace,就可以把这两个network namespace连起来,形成一个点对点的二层网络,如下图所示:
 +------------------+              +------------------+
|        ns1       |              |      ns2         |
|                  |  veth pair   |                  |
|                +-+              +-+                |
| 192.168.1.1/24 | +--------------+ | 192.168.1.2/24 |
|   (veth-ns1)   +-+              +-+   (veth-ns2)   |
|                  |              |                  |
|                  |              |                  |
|                  |              |                  |
+------------------+              +------------------+
下面我们通过试验来实现上图中的网络拓扑。首先创建两个network namespace ns1和ns2。
ip netns add ns1
ip netns add ns2
创建一个veth pair。
ip link add veth-ns1 type veth peer name veth-ns2
将veth pair一端的虚拟网卡放入ns1,另一端放入ns2,这样就相当于采用网线将两个network namespace连接起来了。
ip link set veth-ns1 netns ns1
ip link set veth-ns2 netns ns2
为两个网卡分别设置IP地址,这两个网卡的地址位于同一个子网192.168.1.0/24中。
ip -n ns1 addr add 192.168.1.1/24 dev veth-ns1
ip -n ns2 addr add 192.168.1.2/24 dev veth-ns2
使用ip link命令设置两张虚拟网卡状态为up。
ip -n ns1 link set veth-ns1 up
ip -n ns2 link set veth-ns2 up
从ns1 ping ns2的ip地址。
ip netns exec ns1 ping 192.168.1.2
PING 192.168.1.2 (192.168.1.2) 56(84) bytes of data.
64 bytes from 192.168.1.2: icmp_seq=1 ttl=64 time=0.147 ms
64 bytes from 192.168.1.2: icmp_seq=2 ttl=64 time=0.034 ms
Bridge
veth实现了点对点的虚拟连接,可以通过veth连接两个namespace,如果我们需要将3个或者多个namespace接入同一个二层网络时,就不能只使用veth了。在物理网络中,如果需要连接多个主机,我们会使用网桥,或者又称为交换机。Linux也提供了网桥的虚拟实现。下面我们试验通过Linux bridge来连接三个namespace。
该试验的网络拓扑如下图所示:
+------------------+     +------------------+     +------------------+
|                  |     |                  |     |                  |
|                  |     |                  |     |                  |
|                  |     |                  |     |                  |
|       ns1        |     |       ns2        |     |       ns3        |
|                  |     |                  |     |                  |
|                  |     |                  |     |                  |
|                  |     |                  |     |                  |
|  192.168.1.1/24  |     |  192.168.1.2/24  |     |  192.168.1.3/24  |
+----(veth-ns1)----+     +----(veth-ns2)----+     +----(veth-ns3)----+
        +                          +                        +
        |                          |                        |
        |                          |                        |
        +                          +                        +
+--(veth-ns1-br)-------------(veth-ns2-br)------------(veth-ns3-br)--+
|                                                                    |
|                           linux-bridge                             |
|                                                                    |
+--------------------------------------------------------------------+
创建三个namespace。
ip netns add ns1
ip netns add ns2
ip netns add ns3
创建一个Linux bridge。
brctl addbr virtual-bridge
创建veth pair,然后将veth pair一端的虚拟网卡加入到namespace,再将另一端通过brctl addif命令加入到网桥上。这样就相当于用一条网线将三个namespace连接到了网桥上。
ip link add veth-ns1 type veth peer name veth-ns1-br
ip link set veth-ns1 netns ns1
brctl addif virtual-bridge veth-ns1-br

ip link add veth-ns2 type veth peer name veth-ns2-br
ip link set veth-ns2 netns ns2
brctl addif virtual-bridge veth-ns2-br

ip link add veth-ns3 type veth peer name veth-ns3-br
ip link set veth-ns3 netns ns3
brctl addif virtual-bridge veth-ns3-br
为三个namespace中的虚拟网卡设置IP地址,这些IP地址位于同一个子网192.168.1.0/24中。
ip -n ns1 addr add local 192.168.1.1/24 dev veth-ns1
ip -n ns2 addr add local 192.168.1.2/24 dev veth-ns2
ip -n ns3 addr add local 192.168.1.3/24 dev veth-ns3
设置网桥和虚拟网卡状态为up。
ip link set virtual-bridge up
ip link set veth-ns1-br up
ip link set veth-ns2-br up
ip link set veth-ns3-br up
ip -n ns1 link set veth-ns1 up
ip -n ns2 link set veth-ns2 up
ip -n ns3 link set veth-ns3 up
检查几个namespace之间是否可达。
ip netns exec ns1 ping 192.168.1.2
PING 192.168.1.2 (192.168.1.2) 56(84) bytes of data.
64 bytes from 192.168.1.2: icmp_seq=1 ttl=64 time=0.153 ms
64 bytes from 192.168.1.2: icmp_seq=2 ttl=64 time=0.148 ms
64 bytes from 192.168.1.2: icmp_seq=3 ttl=64 time=0.116 ms
^C
--- 192.168.1.2 ping statistics ---
3 packets transmitted, 3 received, 0% packet loss, time 2015ms
rtt min/avg/max/mdev = 0.116/0.139/0.153/0.016 ms
ip netns exec ns1 ping 192.168.1.3
PING 192.168.1.3 (192.168.1.3) 56(84) bytes of data.
64 bytes from 192.168.1.3: icmp_seq=1 ttl=64 time=0.293 ms
64 bytes from 192.168.1.3: icmp_seq=2 ttl=64 time=0.165 ms
通过上面的试验,我们验证了可以使用Linux bridge来将多个namespace连接到同一个二层网络中。你可能注意到,在分配IP地址的时候,我们只为veth在namespace中那一端的虚拟网卡分配了地址,而没有为加入bridge那一端分配地址。这是因为bridge是工作在二层上的,只会处理以太包,包括ARP解析,以太数据包的转发和泛洪;并不会进行三层(IP)的处理,因此不需要三层的IP地址。
路由
如果两个namespace处于不同的子网中,那么就不能通过bridge进行连接了,而是需要通过路由器进行三层转发。然而Linux并未像提供虚拟网桥一样也提供一个虚拟路由器设备,原因是Linux自身就具备有路由器功能。
路由器的工作原理是这样的:路由器上有2到多个网络接口,每个网络接口处于不同的三层子网上。路由器会根据内部的路由转发表将从一个网络接口中收到的数据包转发到另一个网络接口,这样就实现了不同三层子网之间的互通。Linux内核提供了IP Forwarding功能,启用IP Forwarding后,就可以在不同的网络接口中转发IP数据包,相当于实现了路由器的功能。
备注:Linux的IP Forwarding功能并不是默认开启的,可以采用下面的方法开启:
cat > /etc/sysctl.d/30-ipforward.conf<<EOL
net.ipv4.ip_forward=1
net.ipv6.conf.default.forwarding=1
net.ipv6.conf.all.forwarding=1
EOL

sysctl -p /etc/sysctl.d/30-ipforward.conf
下面我们试验将两个不同三层子网中的namespace通过Linux自身的路由功能连接起来,该试验的网络拓扑如下图所示。注意图中下方的路由器并未对应一个物理或者虚拟的路由器设备,而是采用了一个带两个虚拟网卡的namespace来实现,由于Linux内核启用了IP forwading功能,因此ns-router namespace可以在其两个处于不同子网的网卡之间进行IP数据包转发,实现了路由功能。
+------------------+     +------------------+
|                  |     |                  |
|                  |     |                  |
|                  |     |                  |
|       ns1        |     |       ns2        |
|                  |     |                  |
|                  |     |                  |
|                  |     |                  |
|  192.168.1.2/24  |     |  192.168.2.2/24  |  ns1 route: 192.168.2.0/24 via 192.168.1.1
+----(veth-ns1)----+     +----(veth-ns2)----+  ns2 route: 192.168.1.0/24 via 192.168.2.1
         +                          +
         |                          |
         |                          |
         +                          +
+--(veth-ns1-br)-------------(veth-ns2-br)--+
|   192.168.1.1               192.168.2.1   |
|                 ns-router                 |
|       (Linux Kernel IP Forwarding)        |
+-------------------------------------------+
创建三个namespace。
ip netns add ns1
ip netns add ns2
ip netns add ns-router
创建veth pair,并使用veth pair将ns1和ns2连接到由ns-router实现的路由器上。
ip link add veth-ns1 type veth peer name veth-ns1-router
ip link set veth-ns1 netns ns1
ip link set veth-ns1-router netns ns-router

ip link add veth-ns2 type veth peer name veth-ns2-router
ip link set veth-ns2 netns ns2
ip link set veth-ns2-router netns ns-router
为虚拟网卡设置ip地址,ns1和ns2分别为192.168.1.0/24和192.168.2.0/24两个子网上,而ns-router的两个网卡则分别连接到了这两个子网上。
ip -n ns1 addr add 192.168.1.2/24 dev veth-ns1
ip -n ns2 addr add 192.168.2.2/24 dev veth-ns2
ip -n ns-router addr add 192.168.1.1/24 dev veth-ns1-router
ip -n ns-router addr add 192.168.2.1/24 dev veth-ns2-router
将网卡的状态设置为up。
ip -n ns1 link set veth-ns1 up
ip -n ns2 link set veth-ns2 up
ip -n ns-router link set veth-ns1-router up
ip -n ns-router link set veth-ns2-router up
此时尝试从ns1 ping ns2,会失败,原因是虽然ns-router可以进行路由转发,但ns2的IP地址不在ns1的子网中,ns1在尝试发送IP数据包时找不到对应的路由,因此会报错,提示Network is unreachable。此时IP数据包并未能发送到ns-router上。
ip netns exec ns1 ping 192.168.2.2
ping: connect: Network is unreachable
我们在ns1和ns2中分别加上到达对方子网的路由,即将发送到对方子网的IP数据包先发送到路由器上本子网对于的网络接口上,然后通过路由器ns-router进行转发
ip netns exec ns1 ip route add 192.168.2.0/24 via 192.168.1.1
ip netns exec ns2 ip route add 192.168.1.0/24 via 192.168.2.1
此时再在两个ns中尝试ping对方,就可以成功了。
ip netns exec ns1 ping 192.168.2.2
PING 192.168.2.2 (192.168.2.2) 56(84) bytes of data.
64 bytes from 192.168.2.2: icmp_seq=1 ttl=63 time=0.064 ms
64 bytes from 192.168.2.2: icmp_seq=2 ttl=63 time=0.086 ms
^C
--- 192.168.2.2 ping statistics ---
2 packets transmitted, 2 received, 0% packet loss, time 1009ms
rtt min/avg/max/mdev = 0.064/0.075/0.086/0.011 ms
ip netns exec ns2 ping 192.168.1.2
PING 192.168.1.2 (192.168.1.2) 56(84) bytes of data.
64 bytes from 192.168.1.2: icmp_seq=1 ttl=63 time=0.106 ms
64 bytes from 192.168.1.2: icmp_seq=2 ttl=63 time=0.087 ms
为了方便理解,在该试验中使用了一个单独的namespace ns-router来承担路由器的功能,实际上我们可以直接把veth路由器端的虚拟网卡放在default network namespace中,由default network namespace来承担路由器功能。
连接到外部网络
前面在介绍Linux bridge时我们讲到,从网络角度上来说,bridge是一个二层设备,因此并不需要设置IP。但Linux bridge虚拟设备比较特殊:我们可以认为bridge自带了一张网卡,这张网卡在主机上显示的名称就是bridge的名称。这张网卡在bridge上,因此可以和其它连接在bridge上的网卡和namespace进行二层通信;同时从主机角度来看,虚拟bridge设备也是主机default network namespace上的一张网卡,在为该网卡设置了IP后,可以参与主机的路由转发。
通过给bridge设置一个IP地址,并将该IP设置为namespace的缺省网关,可以让namespace和主机进行网络通信。如果在主机上再添加相应的路由,可以让namespace和外部网络进行通信。
下面显示了为Linux bridge设备br0设置了IP地址后的逻辑网络视图。注意下图中Linux bridge(br0)和路由器(default network namespace)上出现了br0这张网卡,即这张网卡同时在二层上工作于Linux bridge中,在三层上工作于default network namespace中。
当将br0设置为缺省网关后,可以从ns1和ns2连接到主机网络10.0.2.15/24上。此时数据流向是这样的:ns1–(网桥)–>br0–(IP Forwarding)–>10.0.2.15/24
route: default gw 192.168.1
+------------------+     +------------------+
|                  |     |                  |
|                  |     |                  |
|                  |     |                  |
|       ns1        |     |       ns2        |
|                  |     |                  |
|                  |     |                  |
|                  |     |                  |
|  192.168.1.2/24  |     |  192.168.1.3/24  |
+---+(veth+ns1)+---+     +---+(veth+ns2)+---+
         +                          +
         |                          |
         |                          |
         +                          +
+-+(veth+ns1+br)+-----------+(veth+ns2+br)+-+
|                                           |
|               Linux bridge                |
|                                           |
+-----------------(br0)---------------------+
                    |
                    |
                    |
+-----------------(br0)---------------------+
|            192.168.1.1/24                 |
|        default network namespace          |
|       (Linux Kernel IP Forwarding)        |
|                                           |
|              10.0.2.15/24                 |
+---------------(enp0s3)--------------------+
下面我们通过命令行来测试这个网络拓扑。
首先创建namespace和bridge
ip netns add ns1
ip netns add ns2
brctl addbr br0
通过veth pair将ns1和ns2连接到bridge上。
ip link add veth-ns1 type veth peer name veth-ns1-br
ip link set veth-ns1 netns ns1
brctl addif br0 veth-ns1-br

ip link add veth-ns2 type veth peer name veth-ns2-br
ip link set veth-ns2 netns ns2
brctl addif br0 veth-ns2-br
为ns1,ns2和br0设置IP地址。
ip -n ns1 addr add local 192.168.1.2/24 dev veth-ns1
ip -n ns2 addr add local 192.168.1.3/24 dev veth-ns2
ip addr add local 192.168.1.1/24 dev br0
将bridge和虚拟网卡的状态设置为up。
ip link set br0 up
ip link set veth-ns1-br up
ip link set veth-ns2-br up
ip -n ns1 link set veth-ns1 up
ip -n ns2 link set veth-ns2 up
此时ns1和ns2,br0之间可以通信,但如果尝试从ns1 ping主机IP地址,则会发现网络不可达,原因是地址不在同一子网上,并且没有相应的路由。
ip netns exec ns1 ping 192.168.1.1
PING 192.168.1.1 (192.168.1.1) 56(84) bytes of data.
64 bytes from 192.168.1.1: icmp_seq=1 ttl=64 time=0.090 ms
^C
--- 192.168.1.1 ping statistics ---
1 packets transmitted, 1 received, 0% packet loss, time 0ms
rtt min/avg/max/mdev = 0.090/0.090/0.090/0.000 ms
ip netns exec ns1 ping 192.168.1.3
PING 192.168.1.3 (192.168.1.3) 56(84) bytes of data.
64 bytes from 192.168.1.3: icmp_seq=1 ttl=64 time=0.083 ms
^C
--- 192.168.1.3 ping statistics ---
1 packets transmitted, 1 received, 0% packet loss, time 0ms
rtt min/avg/max/mdev = 0.083/0.083/0.083/0.000 ms

Press [Enter] key to ping host from ns1...
ip netns exec ns1 ping 10.0.2.15
ping: connect: Network is unreachable
在ns1和ns2中设置br0的IP为缺省网关。
ip netns exec ns1 ip route add default via 192.168.1.1
ip netns exec ns2 ip route add default via 192.168.1.1
此时再从ns1和ns2尝试ping主机IP,发现已经可以正常通信。
ip netns exec ns1 ping 10.0.2.15
PING 10.0.2.15 (10.0.2.15) 56(84) bytes of data.
64 bytes from 10.0.2.15: icmp_seq=1 ttl=64 time=0.052 ms
^C
--- 10.0.2.15 ping statistics ---
1 packets transmitted, 1 received, 0% packet loss, time 0ms
rtt min/avg/max/mdev = 0.052/0.052/0.052/0.000 ms
ip netns exec ns2 ping 10.0.2.15
PING 10.0.2.15 (10.0.2.15) 56(84) bytes of data.
64 bytes from 10.0.2.15: icmp_seq=1 ttl=64 time=0.083 ms
64 bytes from 10.0.2.15: icmp_seq=2 ttl=64 time=0.115 ms
现在我们已经通过将br0设置为缺省网关的方法打通了namespace和主机之间的网络。通过这种方式,再在主机上设置相应的路由,可以连接两个不同主机上处于不同子网中的namespace。让我们考虑下面的网络拓扑:
route: default gw 192.168.1                                     route: default gw 192.168.2.1

+------------------+     +------------------+                   +------------------+     +------------------+
|                  |     |                  |                   |                  |     |                  |
|                  |     |                  |                   |                  |     |                  |
|                  |     |                  |                   |                  |     |                  |
|       ns1        |     |       ns2        |                   |       ns1        |     |       ns2        |
|                  |     |                  |                   |                  |     |                  |
|                  |     |                  |                   |                  |     |                  |
|                  |     |                  |                   |                  |     |                  |
|  192.168.1.2/24  |     |  192.168.1.3/24  |                   |  192.168.2.2/24  |     |  192.168.2.3/24  |
+---+(veth+ns1)+---+     +---+(veth+ns2)+---+                   +---+(veth+ns1)+---+     +---+(veth+ns2)+---+
         +                          +                                    +                          +
         |                          |                                    |                          |
         |                          |                                    |                          |
         +                          +                                    +                          +
+-+(veth+ns1+br)+-----------+(veth+ns2+br)+-+                   +-+(veth+ns1+br)+-----------+(veth+ns2+br)+-+
|                                           |                   |                                           |
|               Linux bridge                |                   |               Linux bridge                |
|                                           |                   |                                           |
+-----------------(br0)---------------------+                   +-----------------(br0)---------------------+
                    |                                                               |
                    |                                                               |
                    |                                                               |
+-----------------(br0)---------------------+                   +-----------------(br0)---------------------+
|            192.168.1.1/24                 |                   |            192.168.2.1/24                 |
|        default network namespace          |                   |        default network namespace          |
|       (Linux Kernel IP Forwarding)        |                   |       (Linux Kernel IP Forwarding)        |
|                                           |                   |                                           |
|              10.0.2.15                    |                   |              10.0.2.16                    |
+---------------(enp0s3)--------------------+                   +---------------(enp0s3)--------------------+
                   +                                                              +
                   | route: 192.168.2.0/24 via 10.0.2.16                          |  route: 192.168.1.0/24 via 10.0.2.15
                   |                                                              |
                   |                                                              |
                   |                                                              |
                   +--------------------------------------------------------------+
图中两个主机处于子网192.168.2.0/24中,通过在左边主机上添加到右边容器网络192.68.2.0/24的路由,可以让左边的容器网络192.168.1.0/24中的容器发出的IP数据包到达右边的192.168.2.0/24网络。同理,通过在右边主机上添加相应的路由,可以让右边的容器发出的IP数据包到达左边的192.168.1.0/24网络。
此时如果从左边的ns1 (192.168.1.2)ping 右边的 ns1(192.168.2.2),数据流向是这样的:
- ns1向外发送一个ICMP数据包,源地址为192.168.1.2,目的地址为192.168.2.2。
- 因为目的地址192.168.2.2和源地址192.168.1.2不在同一子网上,因此数据包被发送到缺省网关192.168.1.1,也就是Linux bridge内部的自带网卡br0。
- br0同时也是主机default network namespace中的一张网卡,因此br0收到该数据包后,主机根据路由条目192.168.2.0/24 via 10.0.2.16判断应该将该数据包发送到10.0.2.16,也就是右边主机的网卡地址上。
- 右边主机在收到该数据包后,根据本地的直连路由将数据包发送到br0 192.168.2.1上。
- br0将数据包发送到目的地址192.168.2.2上。
通过traceroute命令可以看到数据包的流向:
sudo ip netns exec ns1 traceroute 192.168.2.2
traceroute to 192.168.2.2 (192.168.2.2), 30 hops max, 60 byte packets
 1  _gateway (192.168.1.1)  0.117 ms  0.022 ms  0.012 ms
 2  10.0.2.16 (10.0.2.16)  0.300 ms  0.201 ms  0.145 ms
 3  192.168.2.2 (192.168.2.2)  0.261 ms  0.234 ms  0.250 mss
该试验的网络拓扑中,两个主机处于同一个二层网络中,如果主机处于不同的子网,只要在中间的路由器上添加相应的路由,也可以实现左右两边容器网络之间的通信。这就是一个简单的underlay容器通信方案。该方案要求控制网络中的主机网络设置和路由器,在主机和路由器中添加相应的路由,以打通容器网络。该方案对底层网络的控制程度要求较高,在很多情况下,我们无法直接对物理路由器进行控制,或者希望云环境的网络和底层网络解耦,以实现更灵活的云化网络部署,这种情况下,我们就会使用overlay的网络方案,使用overlay方案对底层网络只要求基本的三层可达,因此对底层网络基础设施基本没有依赖,我将在后续的文章中对overlay方案进行介绍。
本文试验所采用的所有命令已经编写成可以执行的脚本,可以从该github地址下载后自行执行试验。